
![Arlo Pro 3, a Better Value 2K Outdoor Security Camera [Review]](https://img.hipsterpixel.co/arlo-pro-3-security-camera-review-57-c.jpg "Arlo Pro 3, a Better Value 2K Outdoor Security Camera [Review]")
Arlo Pro 3, a Better Value 2K Outdoor Security Camera [Review]
Last year I reviewed the Arlo Ultra, the top of the line 4K security camera from Arlo. I had a great experience with it. However it had poor battery life and is a very, very expensive product. The Arlo Pro 3 is the latest generation of a 2K resolution camera. I’m hoping that the lower resolution and newer hardware would help in regards to battery life.
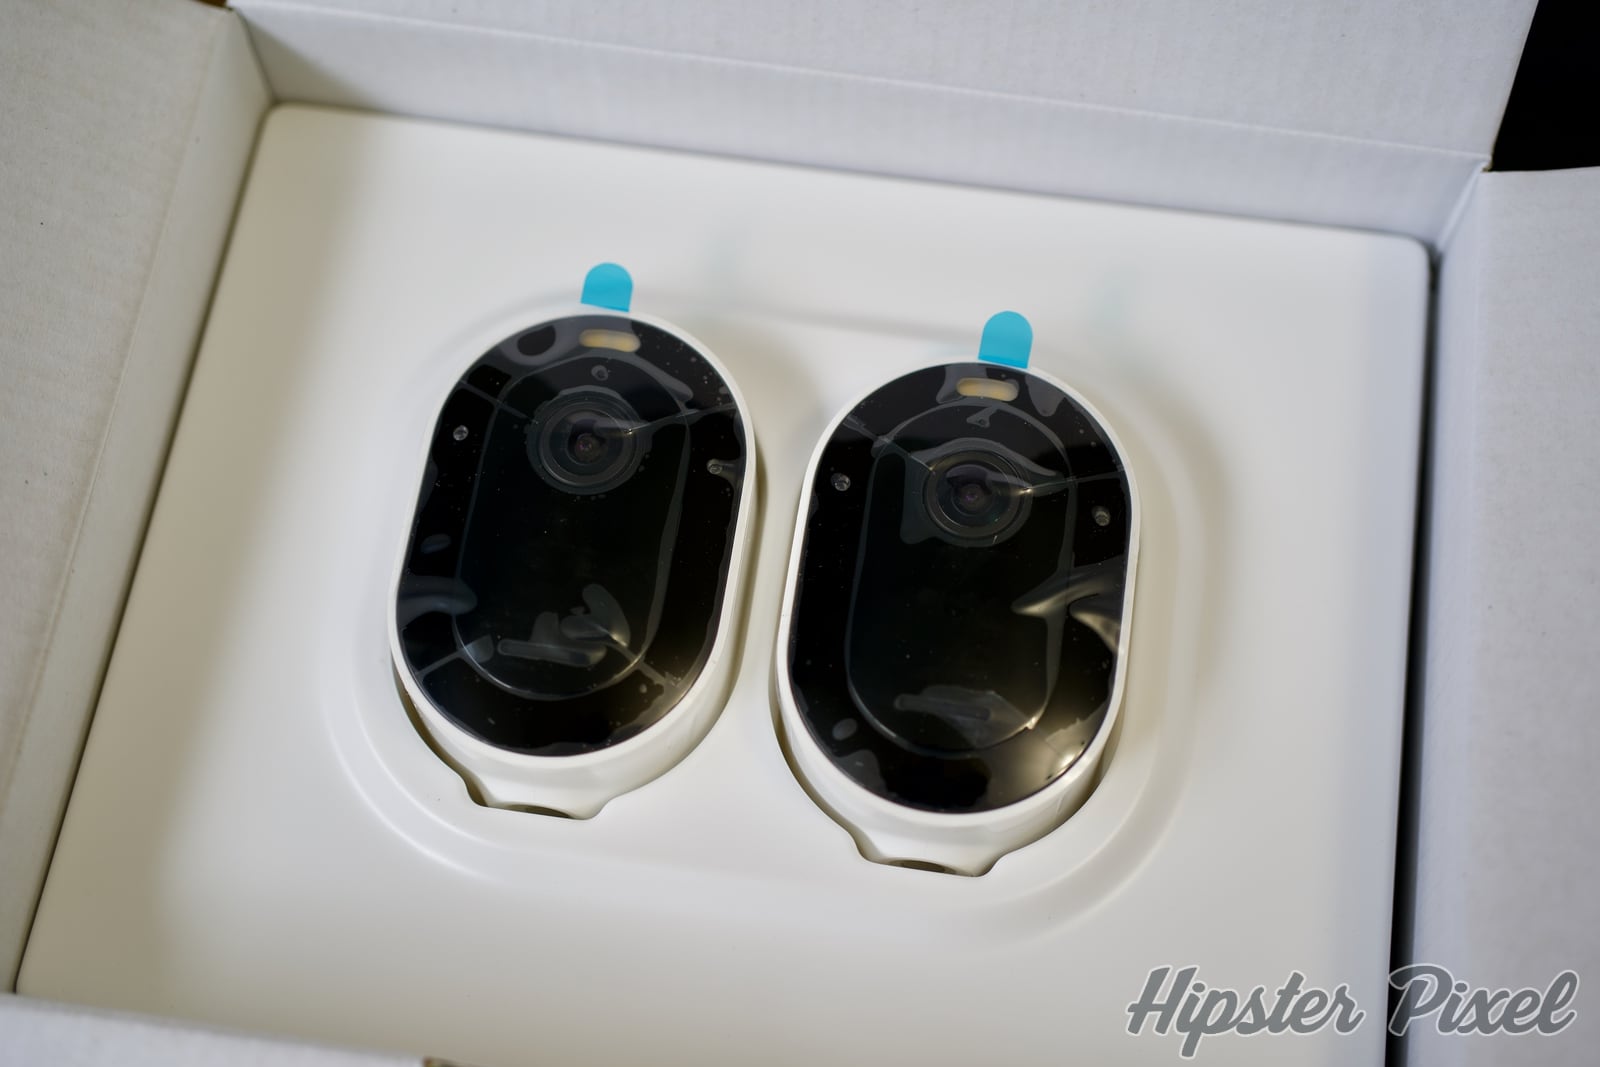
The Arlo Pro 3 I have on hand is the two-camera kit with a base station kit; therefore I’m hoping to get most of the most important features from the Arlo Ultra like Vehicle and People detection, night mode and spotlight.
If you compare the Arlo Ultra with the Arlo Pro 3, the only changes are 4K to 2K, 180˚ to 160˚, no wind reduction but it has echo cancellation and record footage to a USB drive instead of microSD. The only different setting I could find is the operating temperature, 60˚C for the Ultra and 45˚C for the Pro 3. Maybe make sure not to place it close to a dark coloured wall in direct sunlight?
Design
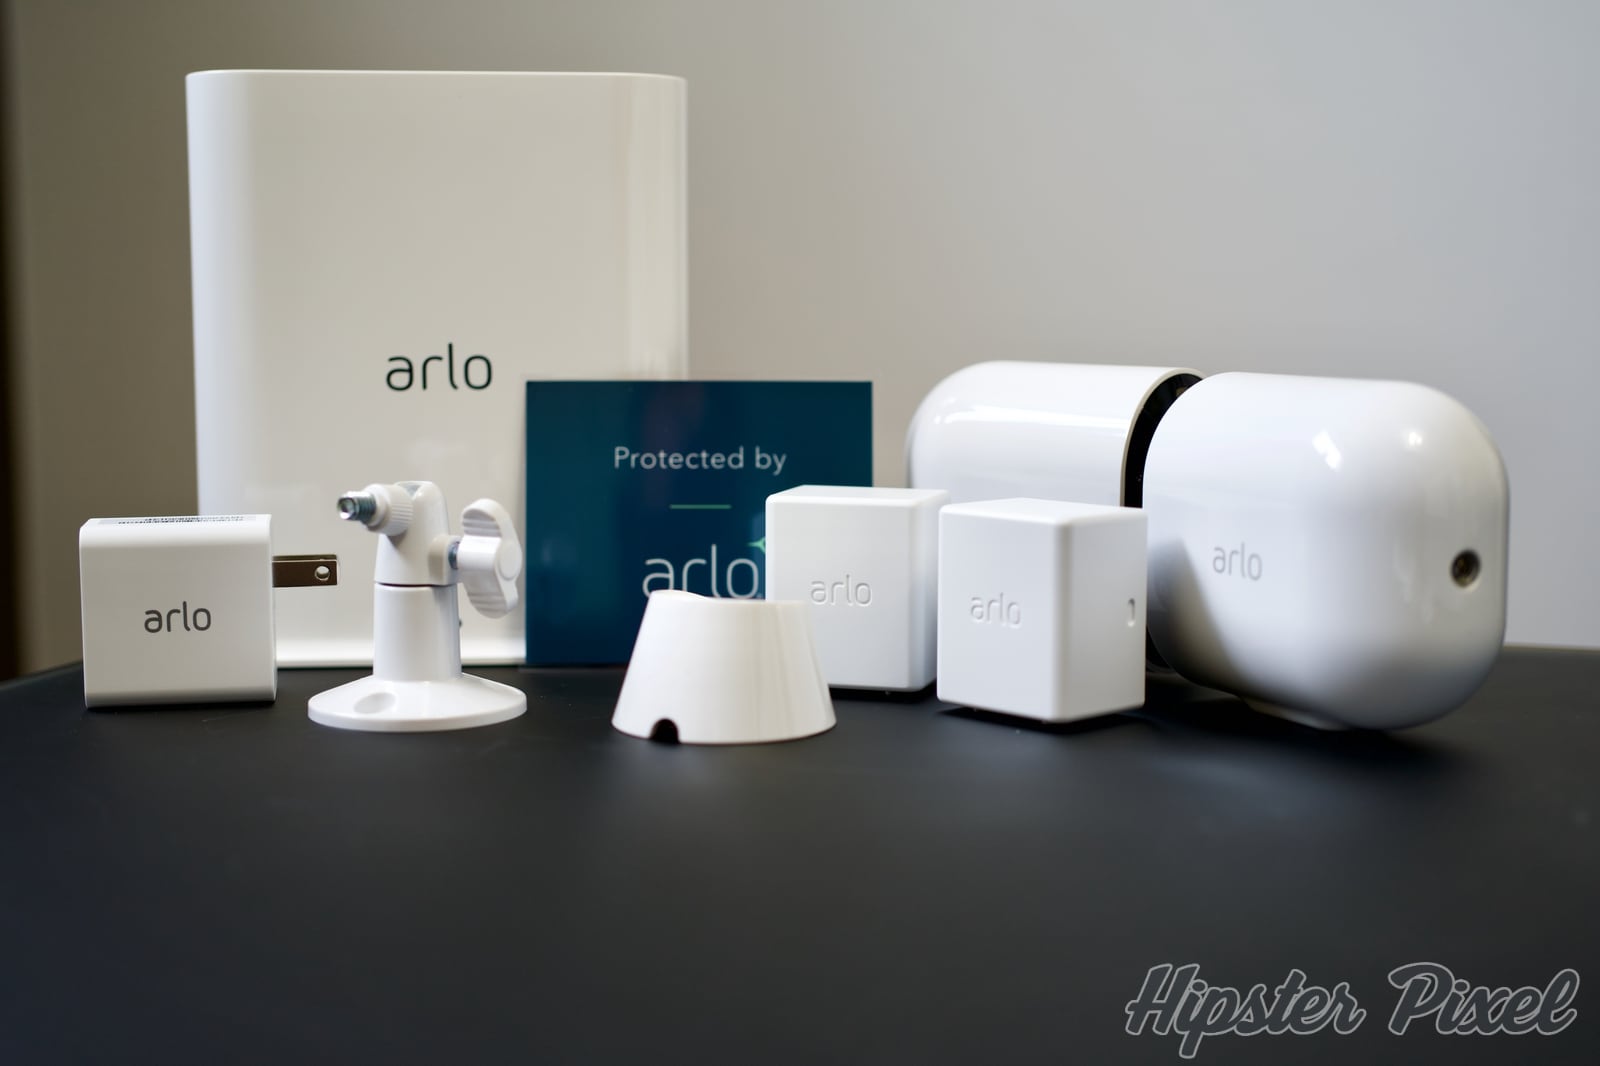
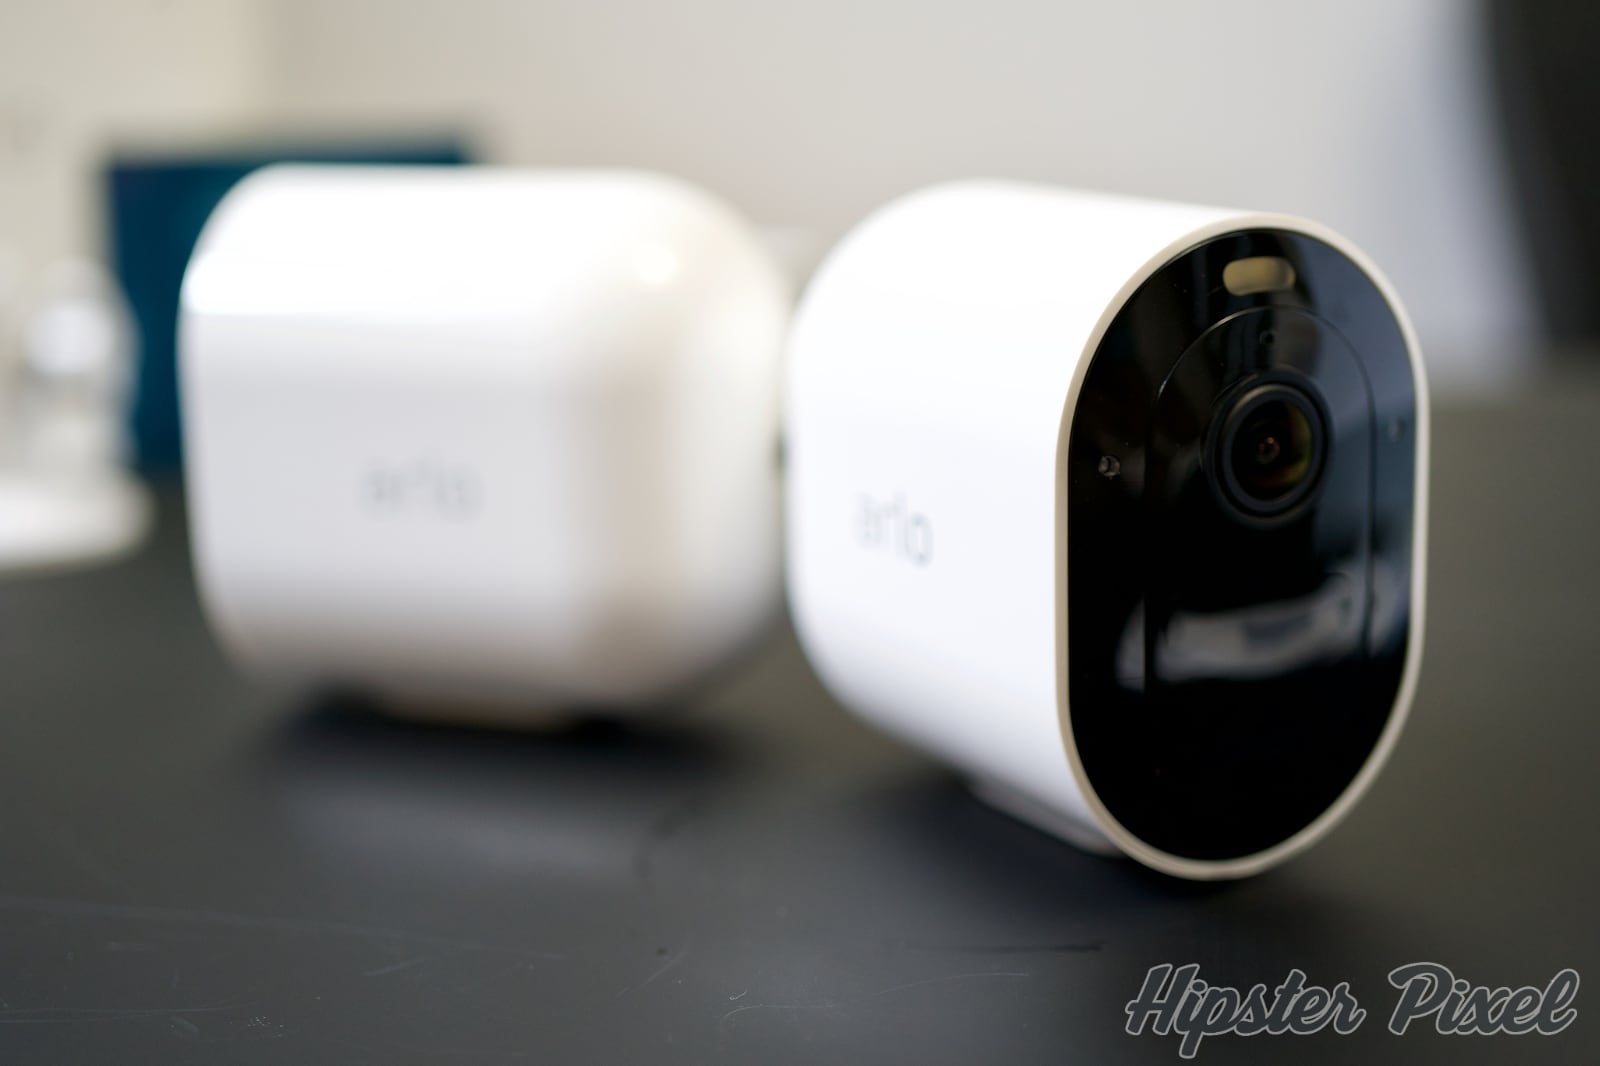
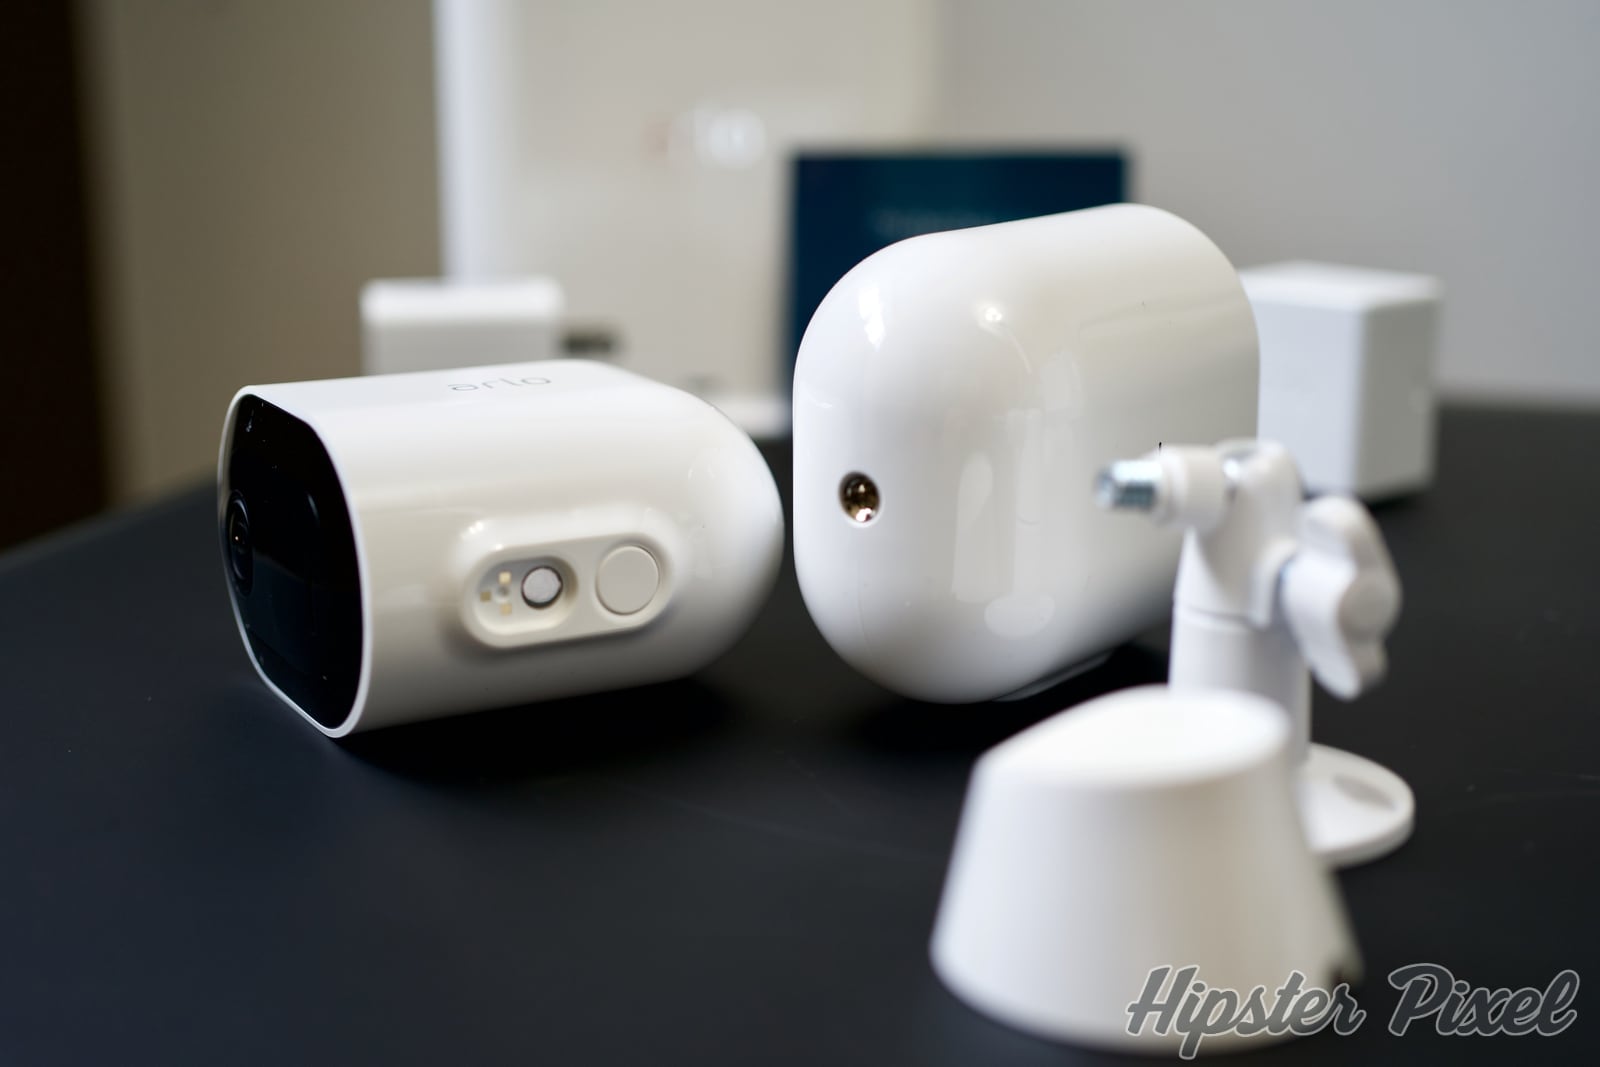
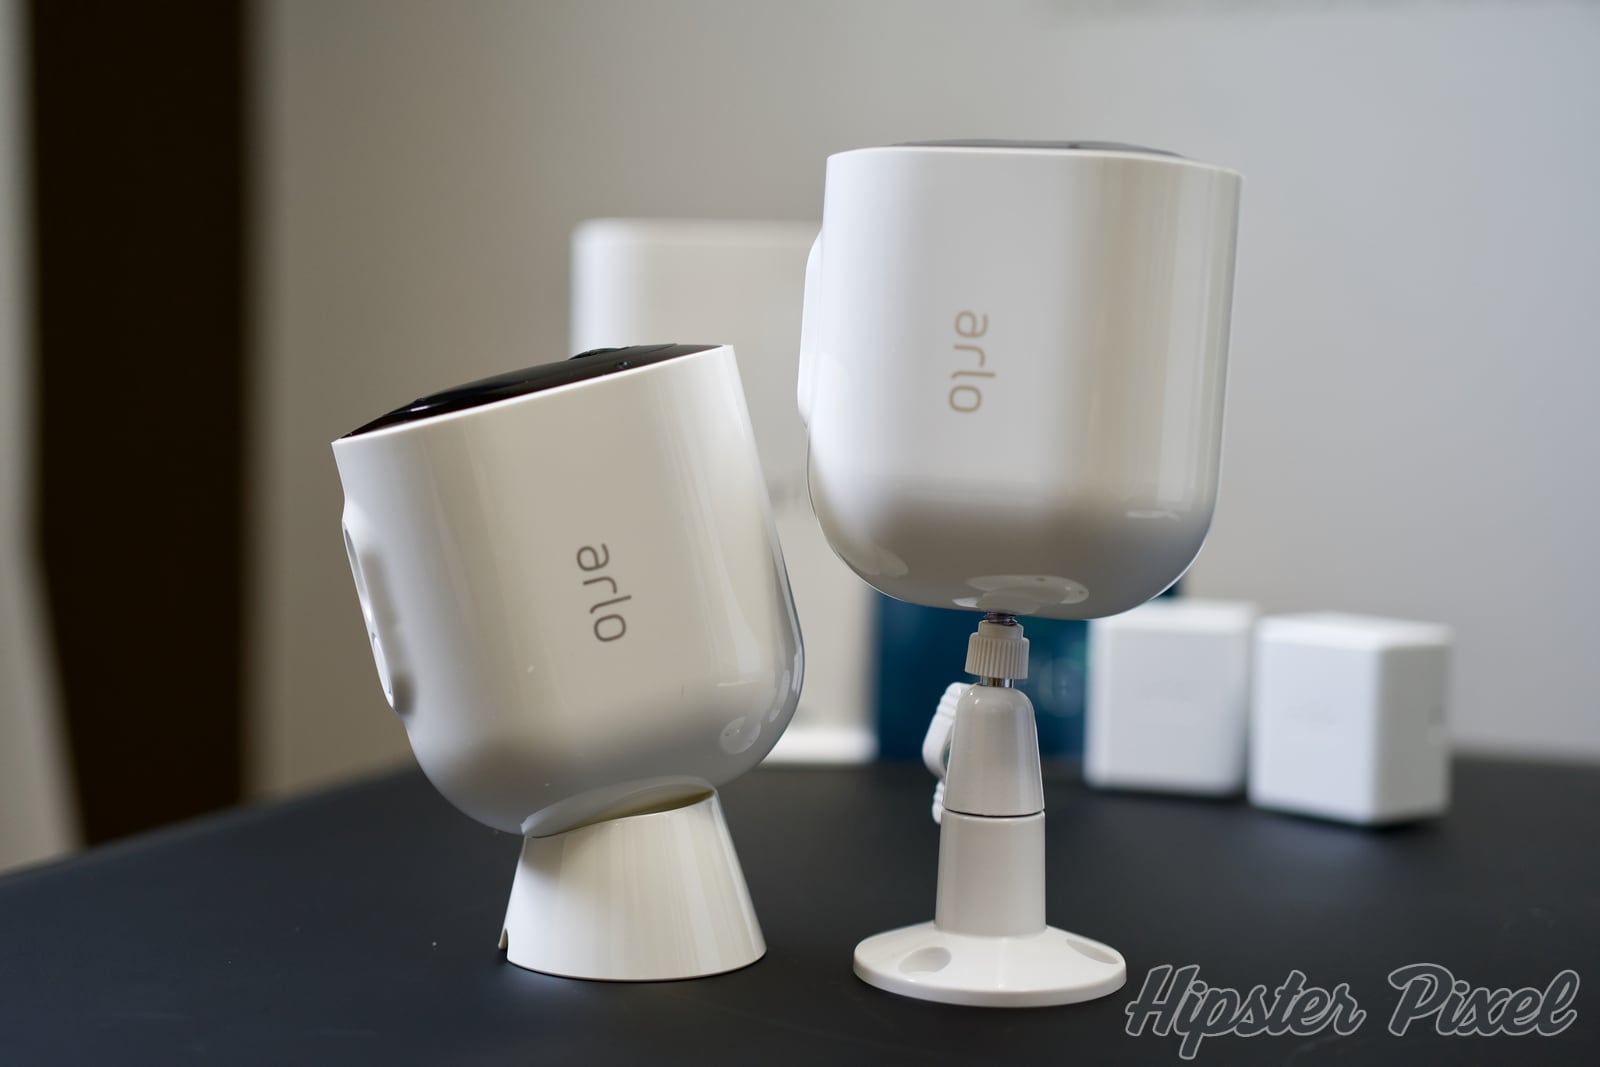
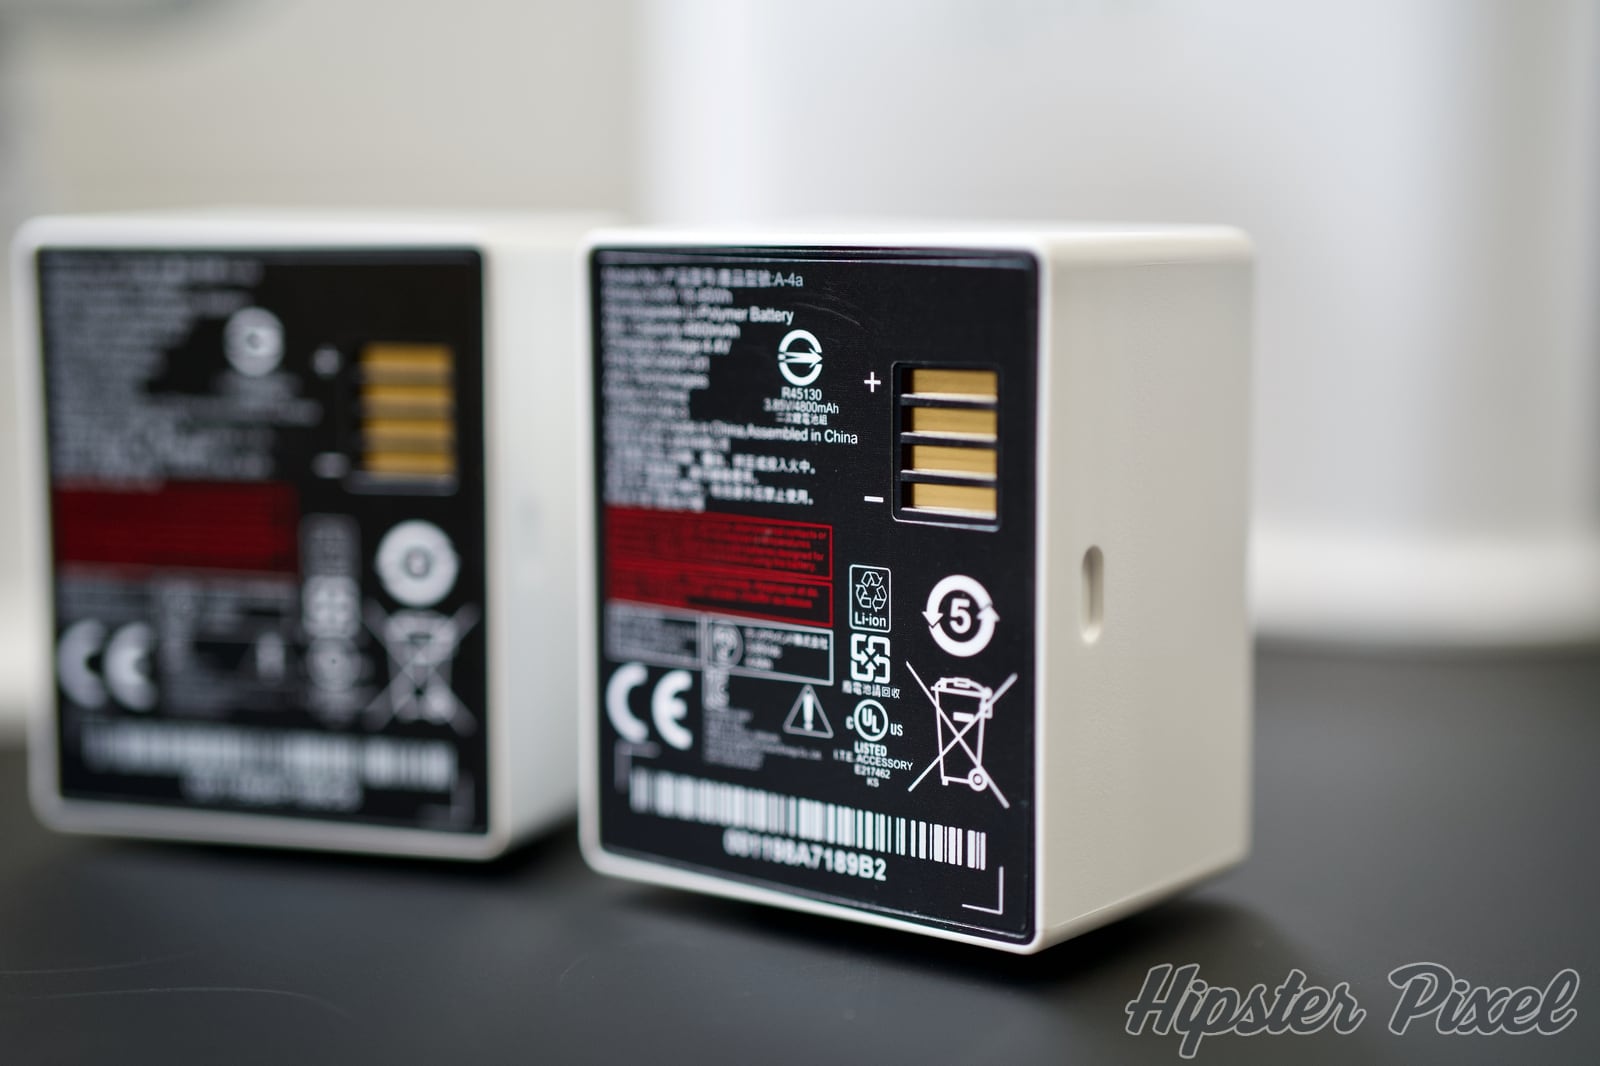
The Pro 3 looks very similar to the Ultra, it’s a black camera module with detachable batteries that you slide inside a glossy white plastic shell. The unit is installed on a very strong magnetic base that swivels around to get the perfect angle. The charging cable is attached with a magnetic cable that reminds me of the Apple MagSafe.
The body is very nicely design and I really love the way they engineered the slide in mechanism. Normally aiming down, the camera has very few seems exposed therefore the gasket is enough to really make this work under the rain and under the snow. Given the impressive performance of the Arlo Pro with our Canadian winter, reusing the same design makes lots of sense!
The SmartHub is very similar to the one I have with the Arlo Ultra, with the small difference that it takes a USB key (or drive) to store the video instead of a microSD card. Here is one tip I have for you, place the SmartHub as close as the camera as possible since they exchange data over their own private Wi-Fi network and not through your home Wi-Fi network. I thought the Smarthub should be closer to my router, but in the end I installed it close to the Arlo Pro and used a wired connection to my local network. This was the most reliable way to get all this working.

Features
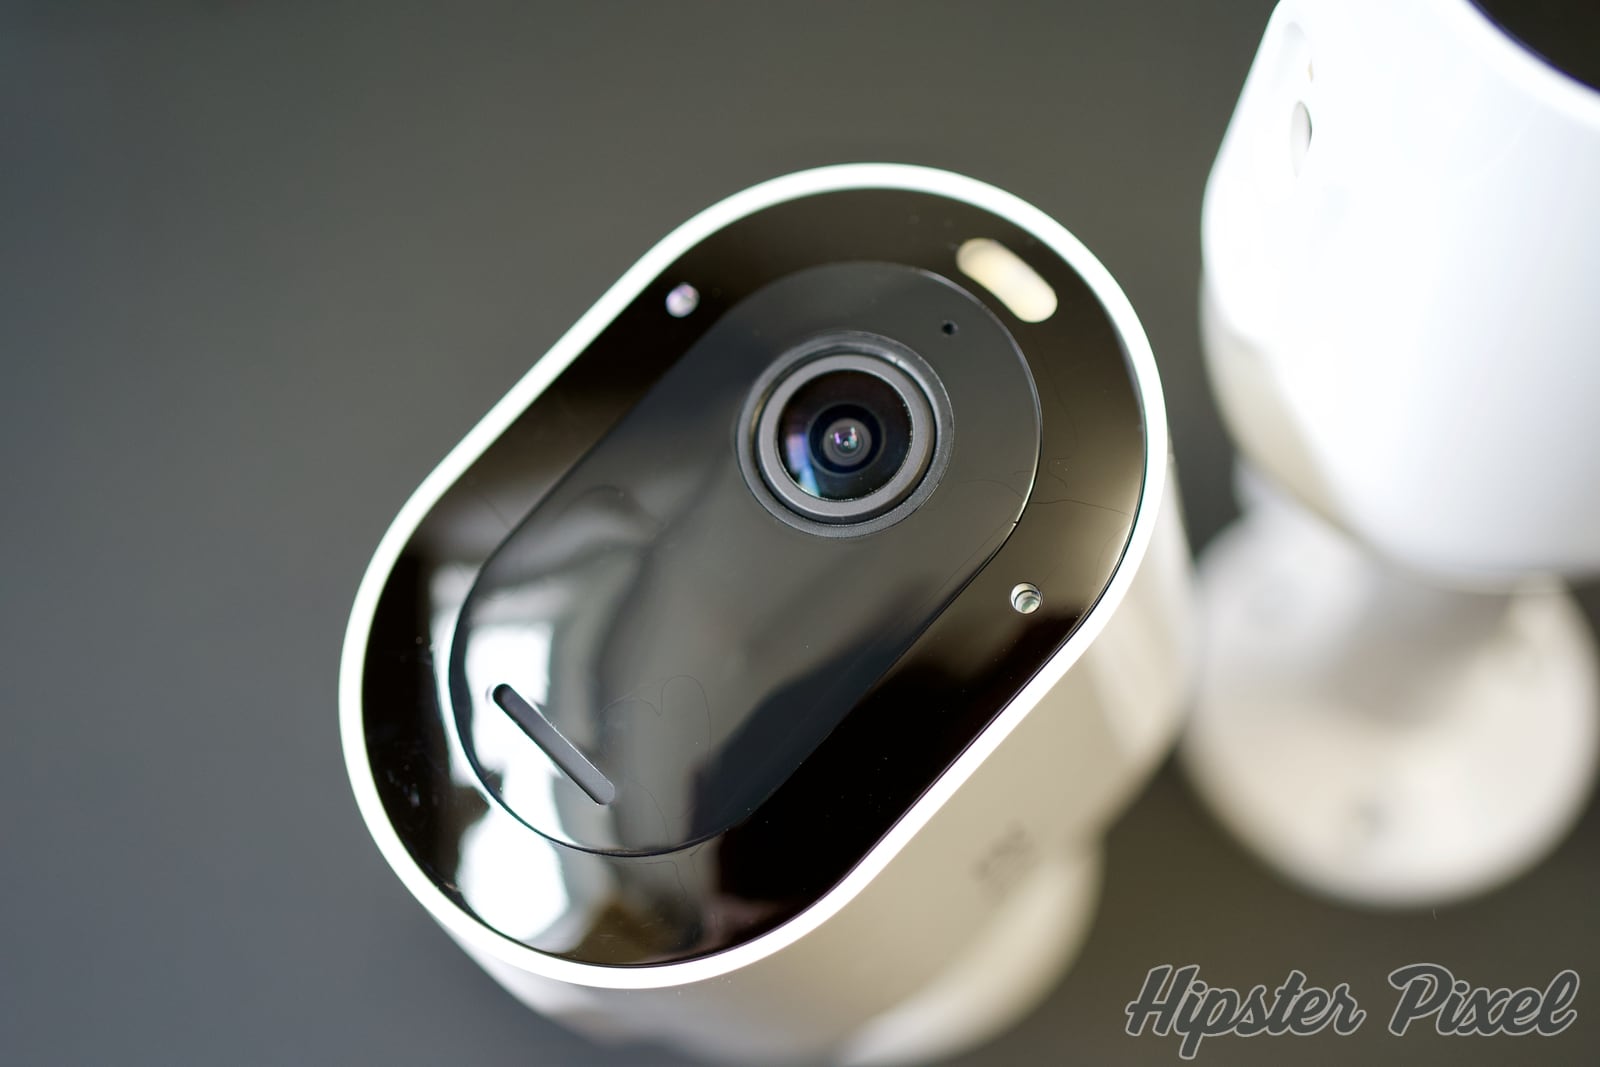
- Integrated Spotlight for Colour Nightvision
- 2K HDR video recording
- 160° viewing angles
- Compatible with HomeKit, Alexa and Google Assistant
- Weather resistant
- Unibody design with magnetic mount and charger cable
- 2-way audio and built-in siren
Initial Configuration
Given that this is an Arlo product, it comes with great design and the mobile application is quite simple to use. You simply tap the Add device button and add either a Base Station or a Camera and follow the easy few steps.
You will also see the device get any firmware update required so they run on their very latest feature set and bug fixes. Once you are done with both cameras and the Base Station, you are now ready to install your cameras inside or outside of your home.

Installation
The first thing you should do is place the cameras where you want them to capture movement. If the Arlo Ultra is any indication, the camera will trigger and record any movement, even outside the Activity Zone you define. Therefore, set them up in a way where you don’t have constant movement in front of them. I have mine pointing to the front of my house where cars and pedestrians are passing by. Due to a bug with the Arlo Ultra software, I was able to discover that I have over 1,200 events per day… More on this in a separate post.
In the box you have two different adapters, one which works with a very strong magnet and can offer lots of great angles when attached to a wall, and one which is fixed on a peg and can also be tightening with a bit larger angle. Sadly, there are not two of each type. So if the magnet one was your preferred attachment, you only get one in the box.

Same goes with the magnetic charging cable, you also only have one in the box and it’s quite short. For charging purpose, either you remove the camera from its base and bring it inside, or you buy an extension USB cable like I did to attach it while leaving the camera in its position.
Once you have tried both ways of installing your Arlo Pro 3 cameras, you can always look up extra-long power cables on Amazon so you never need to recharge your cameras, or lookup {% extra magnetic wall mounts . There are even solar panels so you can install your cameras a bit further from your house and have them self-charge with the power of the sun!
Advanced Configuration
Now that your cameras are installed, I would place the Base Station relatively close to them. You see, one thing I discovered with testing the Arlo Ultra is that the Base Station creates a local encrypted Wi-Fi network shared with the Cameras. So even if your home Wi-Fi network is strong and the Base Station wired to your home network, far away cameras might not be able to reach the Base Station and stream the video.
For example, my Arlo Ultra is installed on top of my home entrance which is close to the living room. I installed the Base Station inside my TV cabinet with an Ethernet cable. This way, I have a strong signal between the Base and the camera. You should do the same if possible.

The Arlo Pro 3 comes with a free 3-month trial of Arlo Smart, the service that allows you to receive Smart Notifications for detected events that contains People, Vehicle, Animal, Audio Alerts and Other Motions. There is even a recent Package detection that allows you to know when a package was delivered to your porch. All these alerts can be configured by camera. For example, a camera in your garage might not need to alert you of packages and a camera in your backyard might not need to check for Vehicles… :) And finally, Call a Friend is a way for your system to call a friend when an event was detected.
Local vs. Cloud Storage
The way recent updates of the Arlo firmware for the Base Station work is that any Smart Notifications events are recorded in the Cloud Storage and can be filtered or retrieved easily. They are recorded in HD. When you plug in a USB drive in the Arlo Pro 3 Base Station, you can have a rolling recording of all events. Every single movement is recorded to the local storage (not just identified People, Vehicle or other). This is why I have a 128GB microSD car in my Arlo Ultra. The Arlo Pro Base Station does not support microSD, but has a simple USB port for a USB drive (stick or hard drive or your choice). Something like a short SanDisk Ultra Flair 128GB could be a good choice, or if you want the absolute smallest the SanDisk Ultra Fit 128GB is an even better choice. Both are USB 3.0 and offer enough speed to read and write without any worries, I would stick to known reputable brands though since the local recording is kind of your “master” recording of all events. If you ever need to refer back to something that happened and if it was not identified correctly with the smart features, at least you have the recordings.

The way the Arlo app allows you to set up local recording is like I said earlier with a rolling recording, meaning that it will fill up to about 90% capacity and then start deleting the oldest videos to save new ones. This is where the size of your storage will impact the number of days of recordings it will keep. The larger the better, especially if you leave for vacations over many weeks.
Two-Way Microphone and Speaker
When an event is triggered, you can load up the live feed and using the microphone button speak to the person that stands in front of the camera. This is useful for friends, neighbors or even the delivery guy to leave more instructions.
Recording Samples
Here are a few recording samples to show you want the Arlo Pro 3 are capable of. For each recording sample, I will list some of the settings and positions so that you know what to expect. One thing that I noticed is that both the cloud video and the locally stored video are 1440p whereas for the Arlo Ultra, only the locally stored videos were 4K.
Backyard, During the Day
During the day, recorded as a People detection.
Backyard, During Golden Hour
During the day, recorded as a People detection.
Backyard, During Dusk
During dusk, recorded as a People detection.
Front Lawn, Night with Night Vision
During the night, recorded as a People detection using the infrared night vision.
Conclusion
As you can see from the above videos and features, the Arlo Pro 3 seems to be a better balanced product than the Arlo Ultra given that the video are sufficiently detailed and processing HD video is less resource intensive than processing 4K. I noticed that the battery life was better with the Arlo Pro 3 versus the Ultra and if you don’t want to charge your batteries too often.
This is doubly important if your camera is pointing in an angle where lots of movement is occurring. With the Ultra I had trouble lasting more than a few days, but I feel the Pro 3 would last more time than this as with my constant passing in front of the camera for most of the day, the battery was still at 92%.
Overall, the experience was great all the way from setup to recording movement and identifying what the camera saw. I used to have issues over the last year but working relentlessly with the Arlo Support, we were able to get through these issues with notifications and Person recognition. Just in time for me to test the Arlo Pro 3! Happy to report that all these nice paid features are working great!
The trial for the cloud services is only 3 months for the Arlo Pro 3 which is a bummer as it was 1 year with the Arlo Ultra. I would love to see this extend or have a promotional pricing for the first paid year.
The Arlo products are expensive, they have always been expensive, but they do offer great features and they work reliably. If you can afford them, you will not be disappointed by them. Personally, I still rock my Arlo Ultra and completely rely on it to see what’s happening in front of my house, every single day!
Review Summary
Arlo Pro 3Arlo
The Arlo Pro 3 is the latest high definition smart security camera from Arlo where they try to mix powerful features, like a spotlight, 1440p recording and more!
The Good Stuff
- Great design
- Feature rich
- 1440p recording
- Only 3-months of cloud free trial
- Expensive
The Ratings
Overall: 83%
Disclaimers:
This product or service was provided by the company or partner for the purpose of this review.
For more information on how we score products, please read how we review products.
For more information on how we score products, please read how we review products.


